|
HOME
SV Lilinoe Pictures
SV Lilinoe Ship's Log and Travels
contact me...
Links
| |
I've set up this page to show some of the work we're doing to improve,
repair, update and make Lilinoe more enjoyable for us.
click on pictures for larger view...
 |
To most, the BBQ is one of the most important
items on the boat...it is for us as we routinely cook outside, keeping the
heat from the cabin.
I ditched the old single-pole, pivoting Magma BBQ mount and built this
folding-down tripod mount. Soon, I'll add a small cutting board that
will fit across the top two rails.
Works great and is extremely sturdy! |
 |
 |
Adding a little more counter-space in the galley is always
desired...for this simple project I cut a restaurant-sized cutting board
down to size to fit over the sink...when I first dropped in, fit so good I
could not get it out, so cut small angles out of the near corners to slip
your fingers in and lift |
 |
I was really bothered at the location of the
engine panel on Lilinoe. It was located at foot-level, in the
cockpit, port side. Problems: can't see the panel and when cockpit
took a good dousing, the panel was underwater -- no go!
So, moved it up to back of cabin...used a couple different woods, added
a small sunbrella cover, re-routed the feed cable and wa-la, a nice,
easily seen engine gauge set.
Due to 2nd mate's request, I'm going to add a pad to the cover so when
one is sitting facing aft, there's a nice, cushy backrest... |
 |
 |
Not the best picture, but here I've added a second
wheel...one that holds both the monitor steering system lines and autohelm
belt. Adjusted the lines running from Monitor; have yet to mount the
autohelm...will let you know how it works out... |
 |
This is the one I'm really enjoying...calling it my
mini-bimini. Keeps the sun off, yet the mizzen is free to
swing. Soon will add side curtains and life-line skirts... |
 |
 |
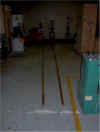
Ohhh...the teak work! These two pic's are
obviously not of the completed project, but show how I did bring this
project home. Nothing like having your cockpit teak laid out on the
floor...if anything, I could sit on it and watch Captain Ron on the TV! |
 |
 |
The propane system was originally mounted on the cabin top,
on "lightly" glassed plywood. Though the system is great,
the location and condition of the mounting board necessitated work.
This pic shows my re-build of the mounting board out of industrial sized
cutting board. I do have a fiberglass cover that goes on top. |
|

|
OK, almost summer here (2002) and there are some swimming holes
calling my name (all outside Tokyo Bay!). Have had this folding
ladder for a couple years...finally a little time to get it setup.
It is the type where you drill holes and install stainless mounting
clips. Heck with more holes, to I mounted it on a beefy piece of
teak that slips behind the toe rail and is secured by a couple short
lines. Underway, it is out of the water and secured forward on the
lifelines. |
|

|
It now Jan of 2004...lot of exterior teak projects
working. This picture and the next are of the toerails being setup
inside prior to bringing out to Lilinoe. These are "beafier"
and original; 2" wide by 1.5" tall. |
|

|
This is a closeup of the scarf joint...worked OK, but next
time I'll use an angle cut to mate the ends. That way will get more
surface area for the resin to grip. |
|

|
This is the cut, assembly and resin of now wood bases for
both the main and mizzen. I chose to run the grain up-and-down
rather than a single piece with horizontal running grain...intent is to
support the mast weight better without compressing... |
|

|
Clamped and setting picture. This block being
assempled for the mizzen...the new main block sits next to it. |
|

|
First picture of the bowsprit re-build...here getting the
length and outer shape correct. Clamps holding the lateral beams
while resin sets. Through-bolts were also used. |
|

|
This picture shows additional support lengths installed... |
|

|
Clamps removed...now beginning to shape to fit the hardware. |
|

|
Here about 80% of the way done...bowsprit is all together
minus the stainless. Yes, the design is different than the original
lattice schedule...but looks just as great! |
|


